SSO with G Suite
With Cyral, you can authenticate database users against your G Suite instance. Below, we show how to set this up.
Prerequisites
- Make sure you have administrator-level access to your G Suite Admin Console.
- Find the URL for your Cyral control plane (e.g.,
exampleco.app.cyral.com)
Create SAML IdP app in G Suite
Navigate to the G Suite Admin Console and select Apps ➡️ SAML Apps ➡️ Add App ➡️ Add custom SAML app
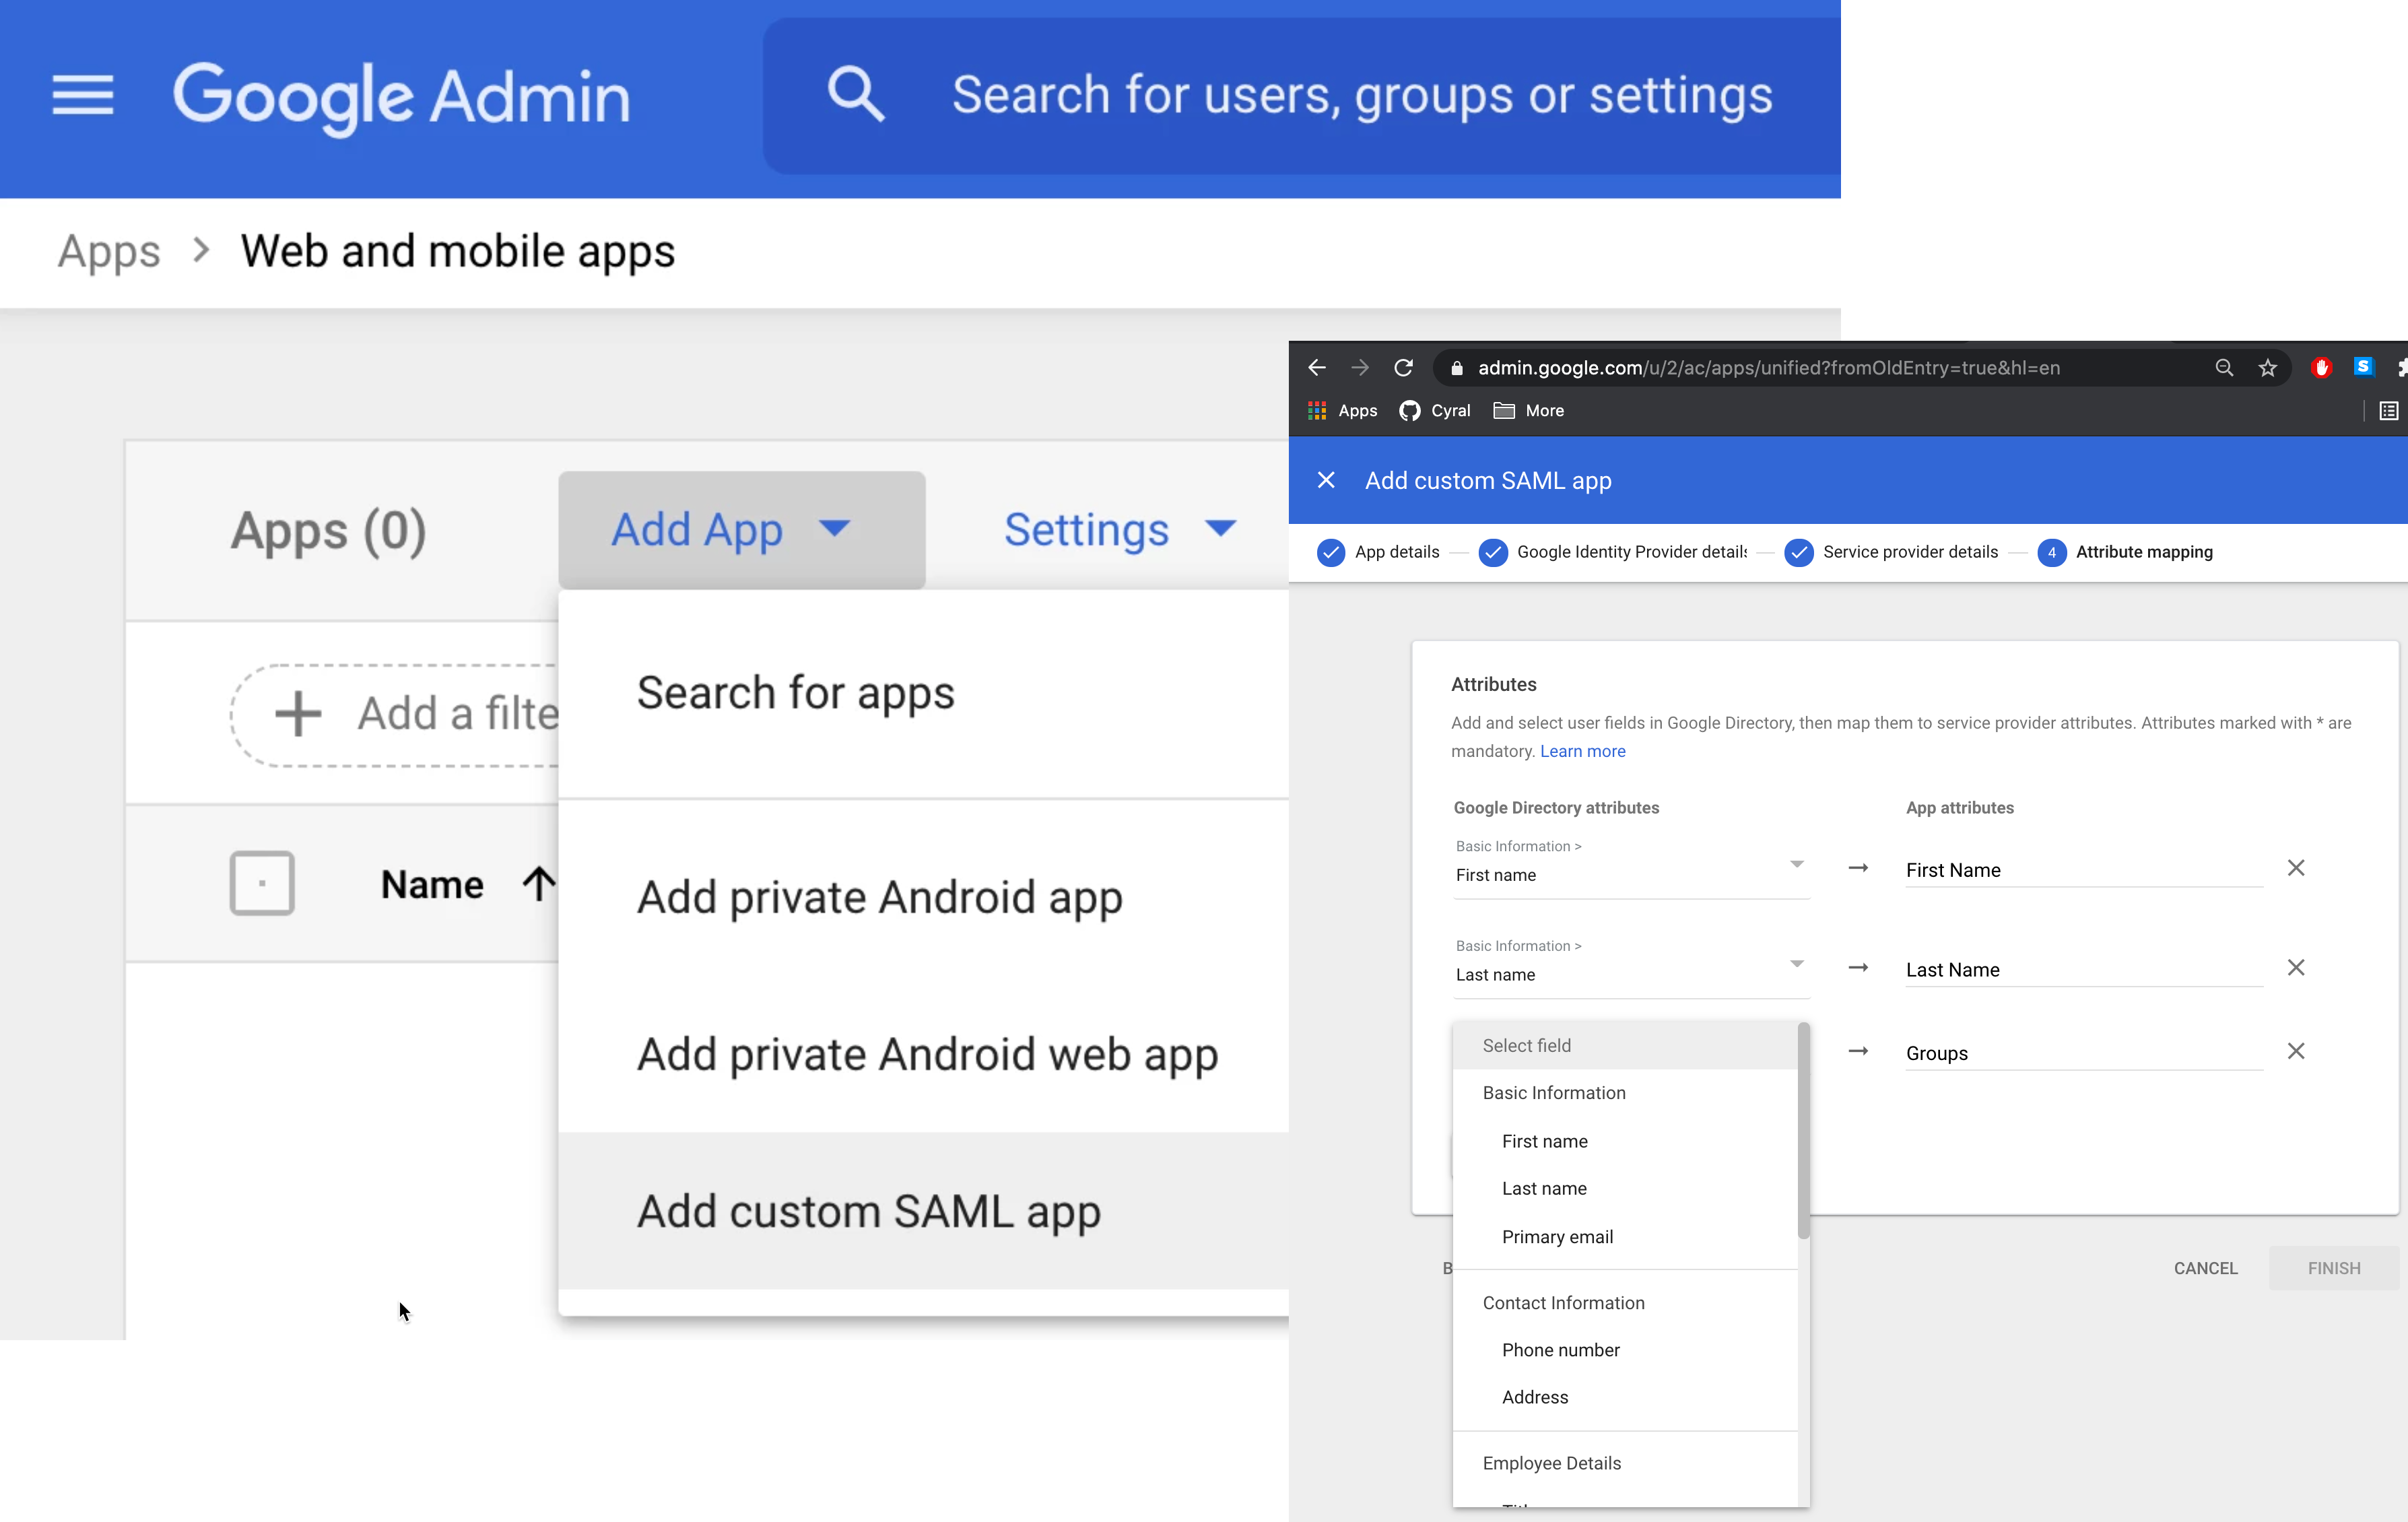
Give your custom SAML app a Name that makes it clear this is the app for Cyral integration. For example, Cyral.
Click Download metadata and save the downloaded file. You'll upload it later in the Cyral control plane UI.
In the same window from which you downloaded the IdP metadata, make note of the IdP ID of your SAML app. The IdP ID is a 9-character identifier embedded in the SSO URL and Entity ID (e.g.,
A01abc2de).Click Continue.
In the Service provider details page, enter your ACS URL and Entity ID in the formats shown here:
ACS URL:
https://$CYRAL_CONTROL_PLANE_DOMAIN/auth/realms/default/broker/gsuite.$IDP_ID/endpointEntity ID:
https://$CYRAL_CONTROL_PLANE_DOMAIN/auth/realms/default
For example:
ACS URL:
https://exampleco.app.cyral.com/auth/realms/default/broker/gsuite.A01abc2de/endpointEntity ID:
https://exampleco.app.cyral.com/auth/realms/default
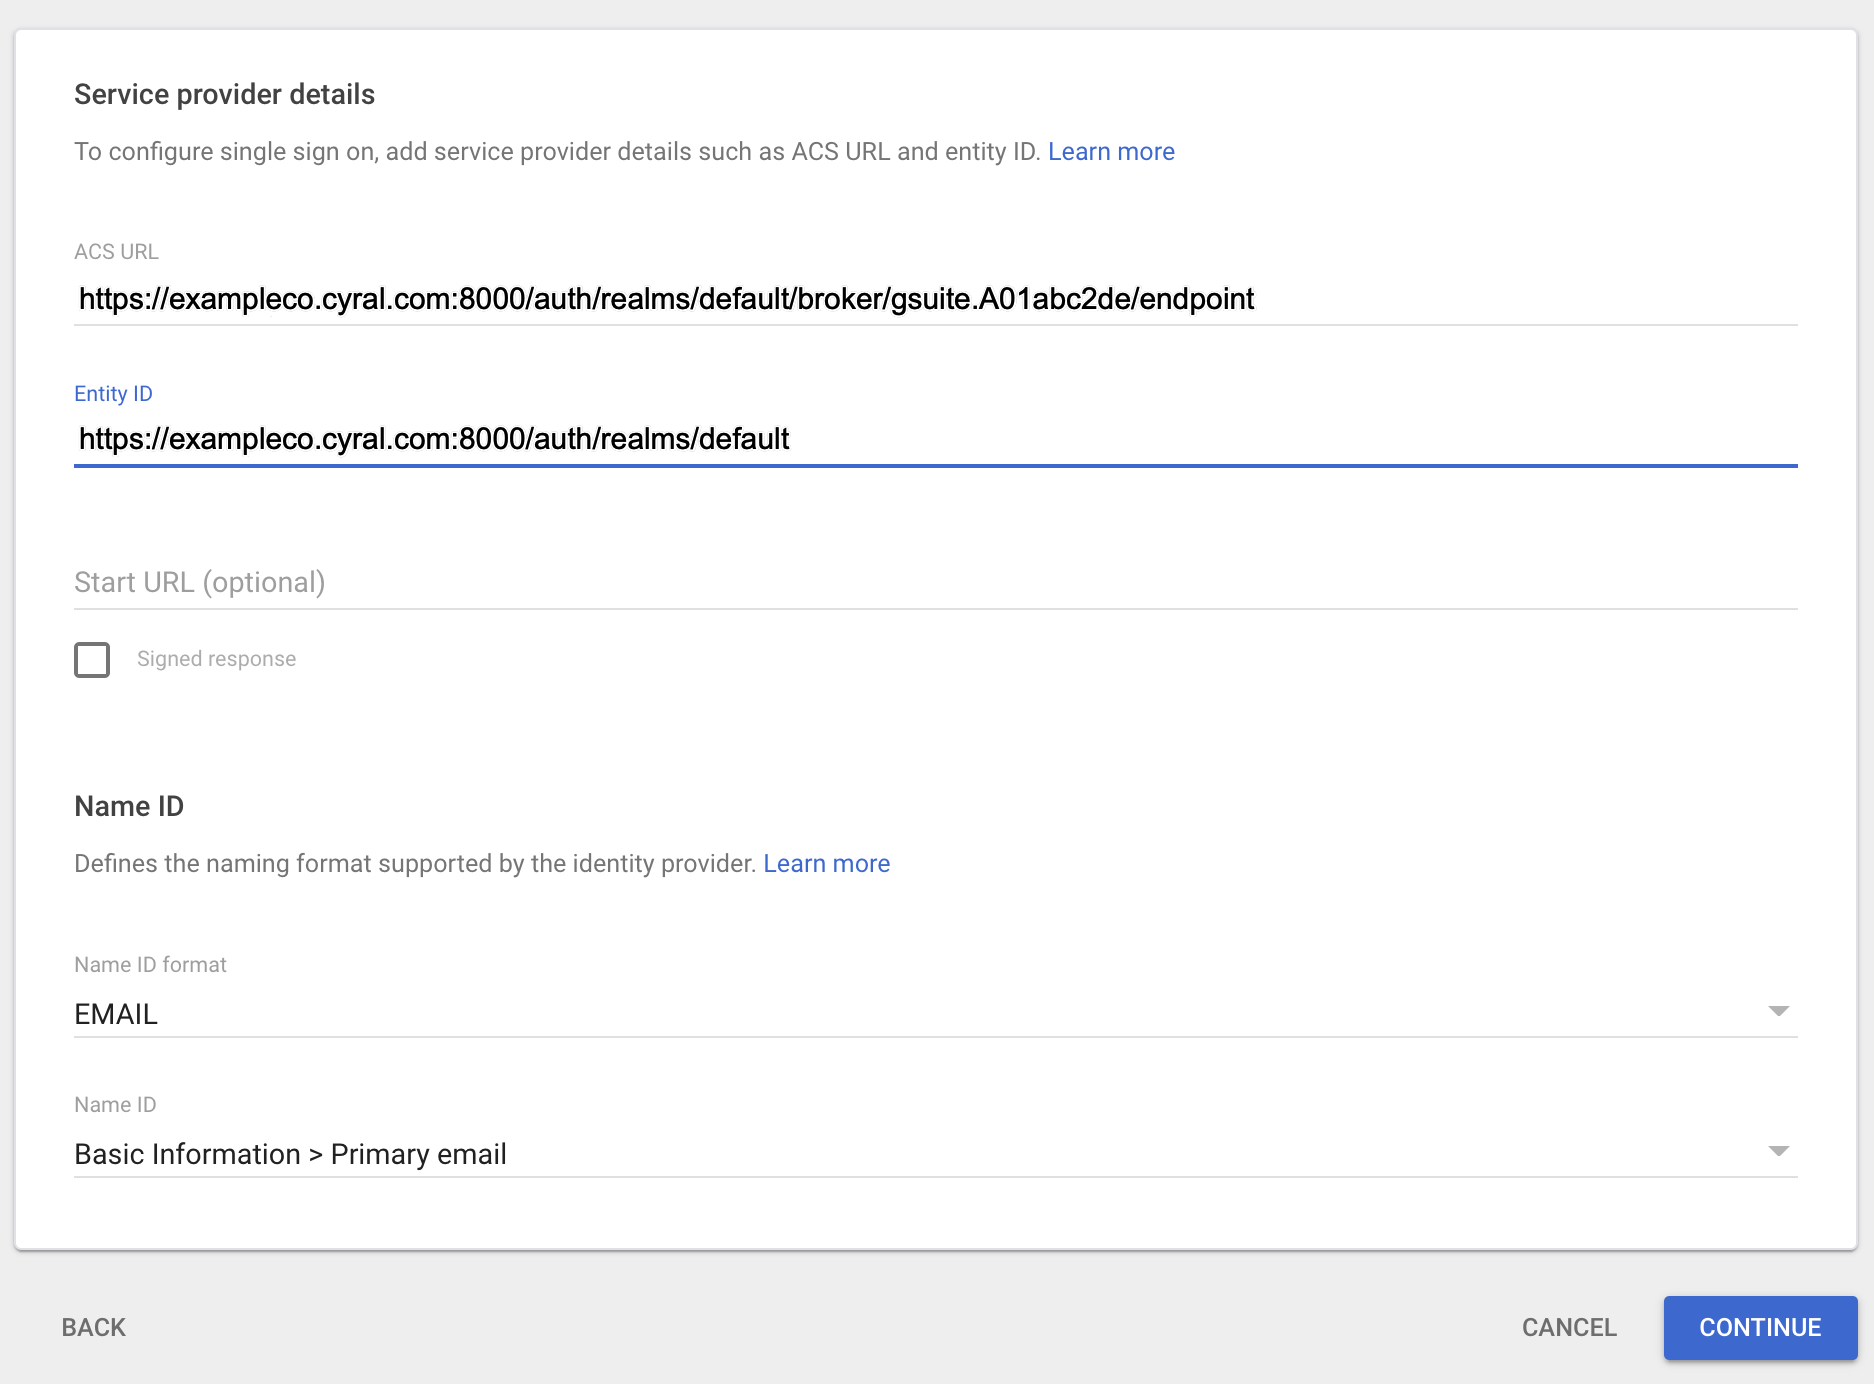
note
Typically no port number is needed in the ACS URL and Entity ID. If your Cyral control plane was upgraded from a version before 2.35, then a port number will be visible in the URL, as shown in the example screenshot, above.
Edit the other fields to match this example, but where we show
exampleco.app.cyral.com, please replace it with your Cyral control plane URL.Click Continue.
On the Attribute mapping page, specify which user data attributes will be sent to Cyral:
First Name: This is required. Choose First name from the drop-down list and type
First Name(both words start with a capital letter!) in the App attributes field. This is case- and formatting-sensitive and won't function properly if anything other thanFirst Nameis entered on the right.Last Name: This is required. Choose Last name from the drop-down list and type
Last Name(both words start with a capital letter!) in the App attributes field. This is case- and formatting-sensitive and won't function properly if anything other thanLast Nameis entered on the right.Groups: This is required. From the drop-down list, select all the groups that will be sent to Cyral and used to manage access. Once you have selected the appropriate groups, type
Groupsin the App attributes field. This is case- and formatting-sensitive and won't function properly if anything other thanGroupsis entered on the right.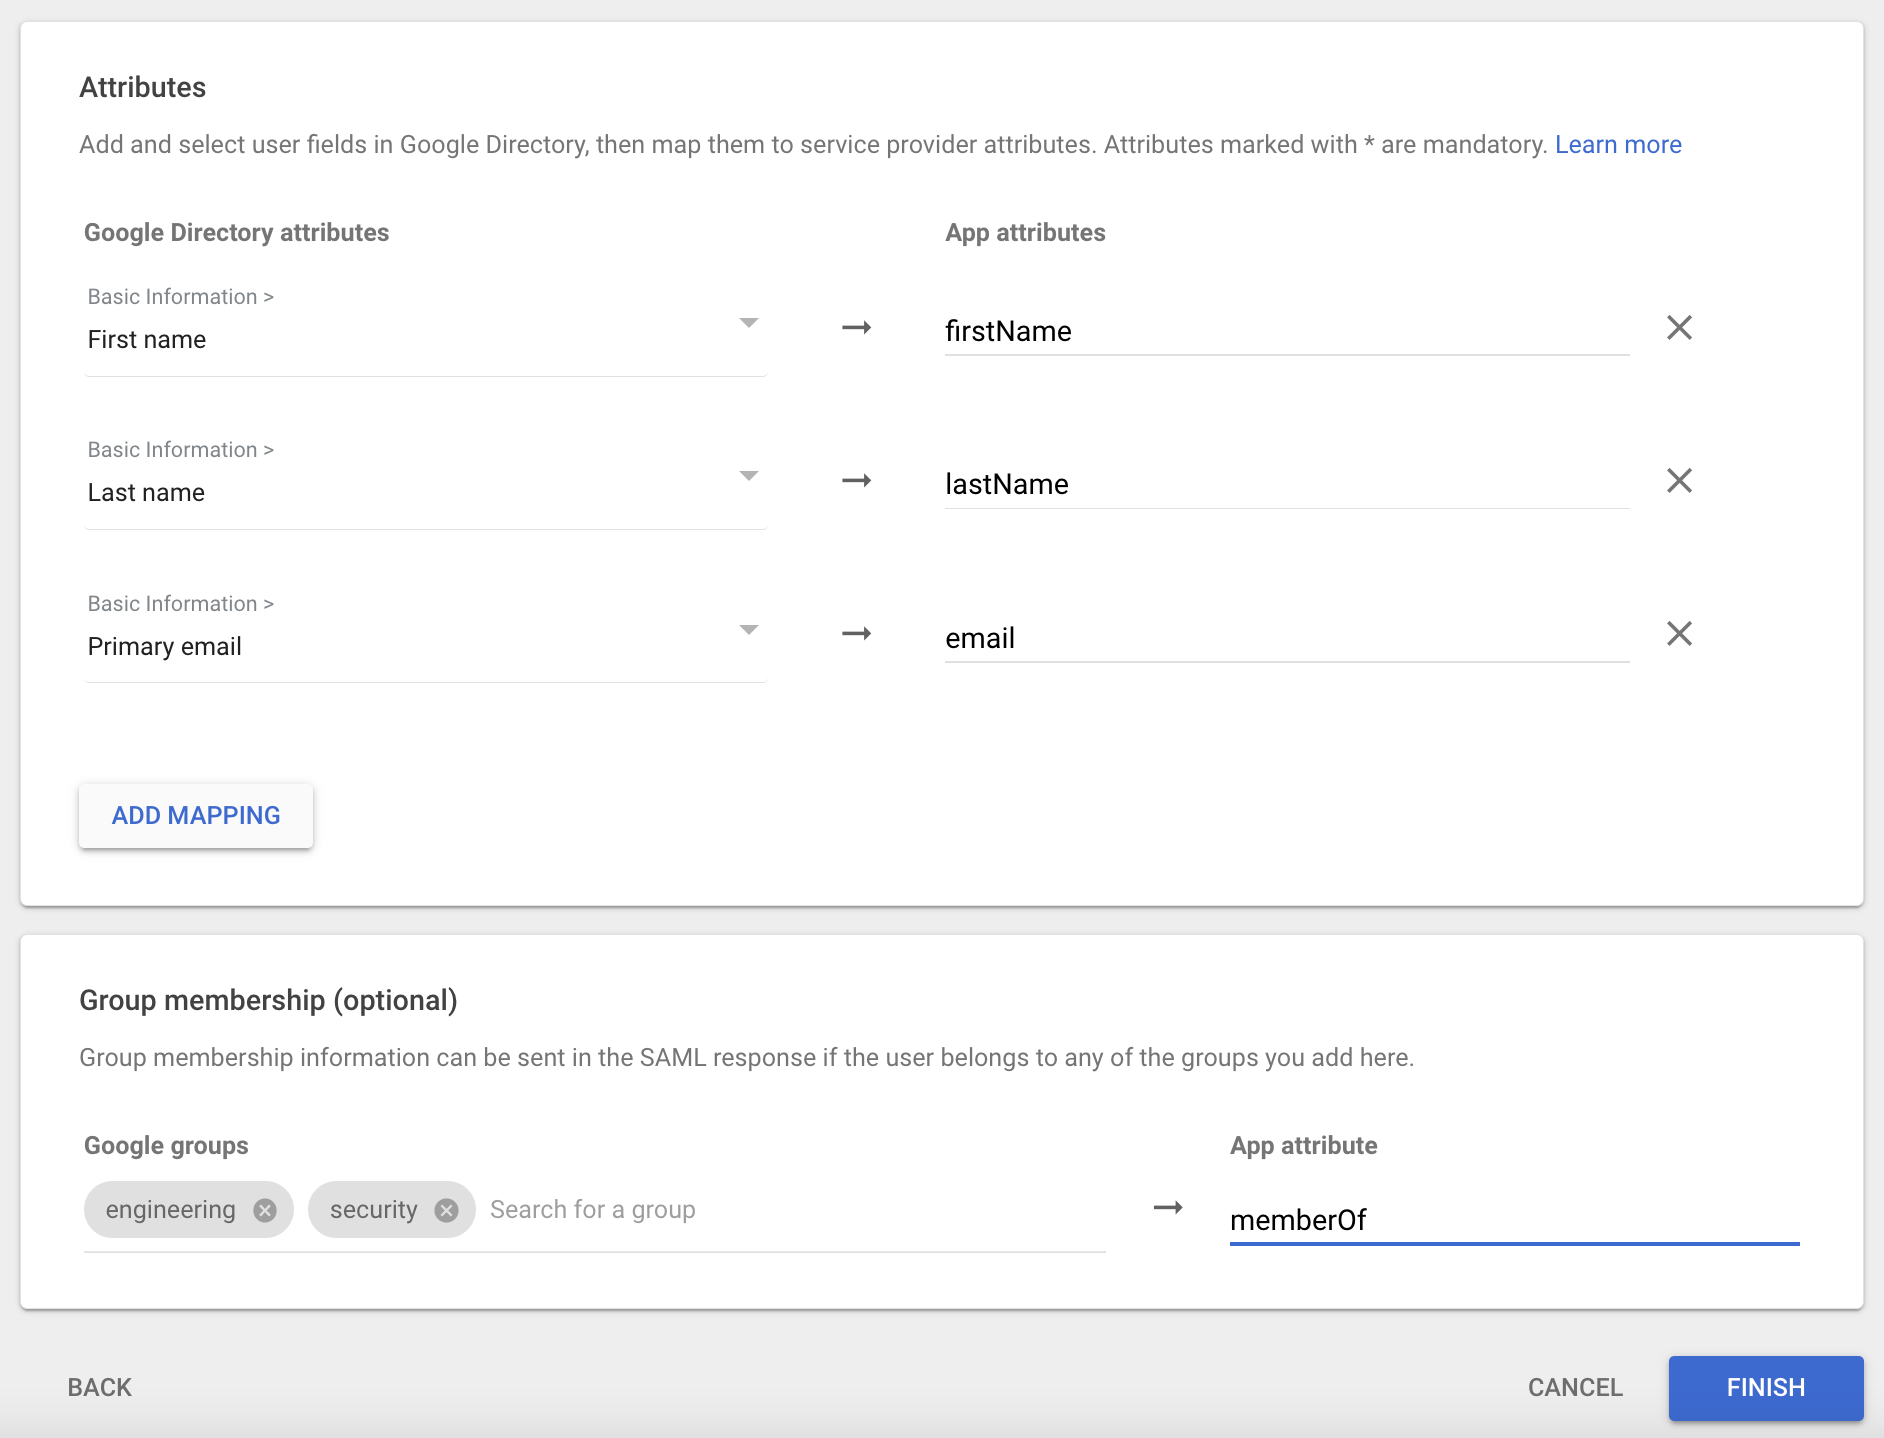
Click Continue.
In the Google Admin ➡️ Web and mobile apps page for your SAML app, go to User access ➡️ View details.
On the details page, use the left bar to turn the app ON for everyone or ON for the subset of users who will access databases through Cyral.
info
Choosing a subset of users does not cause information about the subset to be provided to Cyral.
Now that you've created the G Suite SAML IdP App, you must add it to Cyral as explained below.
Add G Suite IdP to Cyral
In the Cyral control plane UI, go to Integrations ➡️ G Suite ➡️ Setup.
Click New integration.
Provide a Display Name for this SSO provider. This is the name your users and administrators will see when they use or set up this SSO provider.
Click Upload a file and upload the SAML metadata file you saved in the "Download metadata" step earlier.
Click Submit. You will receive a confirmation screen that reminds you SSO login services might not be available immediately.
warning
Creating or updating a SAML App in G Suite does not take effect immediately. Plan to wait 24-48 hours for your G Suite SAML App to become usable for Cyral SSO logins.
Next step
See Set up SSO authentication for users for the steps to activate SSO authentication on each repository that will use it.