SSO with Azure AD
With Cyral, you can authenticate database users against your Azure Active Directory (Azure AD) identity provider, and Cyral can read each user's group memberships from Azure AD to determine the user's privileges. This integration uses Azure AD as a SAML identity provider.
Follow these steps to use your Azure AD to authenticate database users and Cyral administrators.
info
If you're using on-premises Active Directory, see the section, SSO with ADFS.
Get Azure AD URLs from Cyral
Connecting Cyral to Azure AD requires an Enterprise Application in Azure AD. Before you create the Enterprise Application, collect information as shown below:
In the Cyral management console, select Integrations.
On the Azure Active Directory tile, click Configure and click New Integration.
The window displays the SAML configuration settings you'll use in Azure AD to configure the application that manages the Cyral integration. The settings are:
Default identifier. For example, the URL might look like:
https://example.app.cyral.com/auth/realms/defaultReply URI. This typically has the same value as the Default identifier.
Next you'll use the displayed values to integrate Cyral with your Azure AD instance. For now, leave this window open and open a new browser tab to configure Azure AD. Later you will enter values here for SAML Metadata URL and Display Name.
Create Azure app to represent Cyral
Go to your Azure AD administration page and log in to your account as an Administrator.
Create a new Enterprise Application.
- Specify that it's a non-gallery application
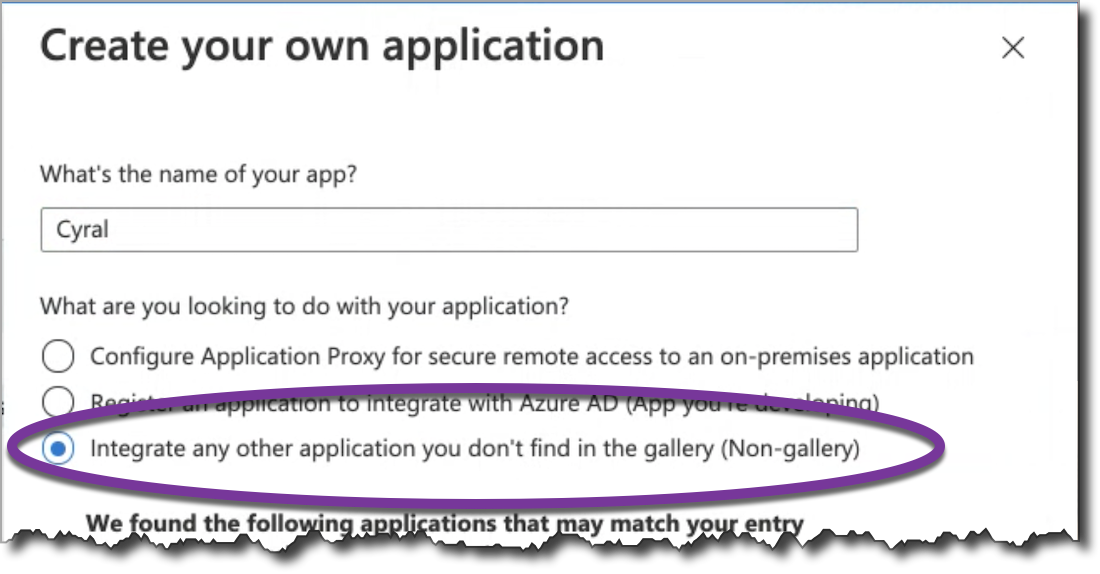
- Specify that it's a non-gallery application
In the application's Single sign-on section, edit the following fields by pasting the values shown in Cyral's Azure Active Directory integration page, which you should have available in another browser tab:
- Identifier (Entity ID); this is shown as the Default Identifier in Cyral.
- Reply URL
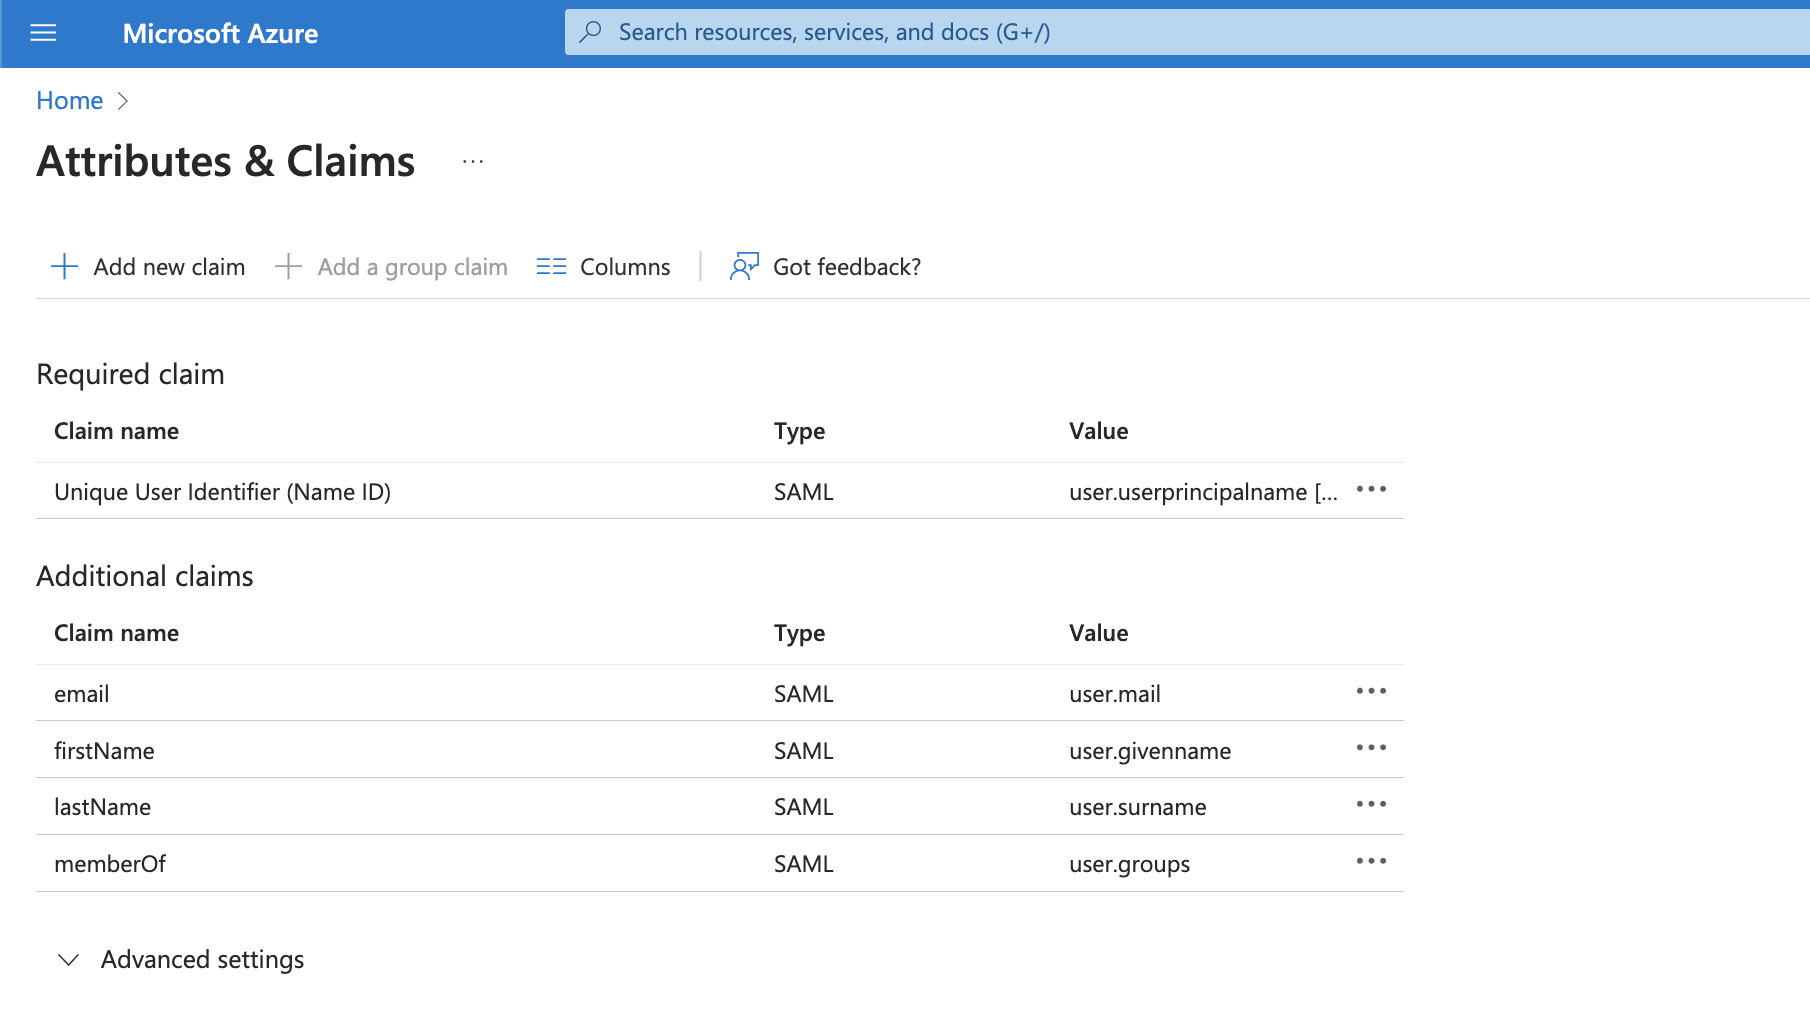
In the User Attributes and Claims section, add a Group Claim:
- In the Which groups field, choose All Groups
- Set the Source Attribute to Group ID.
- Click Save.
Under the application's Users and Groups section, assign the users and groups who will be allowed to log into Cyral.
After saving all of the above, go to the Single sign-on section of your app in Azure AD, and find the app's App Federation Metadata Url (in the SAML Signing Certificate section of the window. Copy that URL for pasting into the Cyral UI.
Add Azure AD integration to Cyral
Return to your browser tab that shows the Cyral management console's Azure Active Directory tile. (If you don't have this open in a tab, that's OK. Navigate to select Integrations, click the Azure Active Directory tile, then Configure: New Integration.)
In the SAML Metadata URL field, paste the value you copied from the App Federation Metadata Url field in Azure.
Provide a Display Name for this SSO provider and click Save. This is the name your users and administrators will see when they use or set up this SSO provider.
caution
Once you've set this name, you cannot change it without deleting and recreating this SSO configuration.
Click Save.
Next step
See Set up SSO authentication for users for the steps to activate SSO authentication on each repository that will use it.