Integration with Okta
SSO with Okta
With Cyral, you can authenticate database users against your Okta identity provider. Optionally, Cyral can read each user's group memberships in Okta to set the user's data privileges and/or Cyral administrative role. This integration uses Okta as a SAML identity provider (IdP).
In this tutorial, we provide you two options to setup an Okta instance to authenticate database users and Cyral administrators: Terraform or manual configuration.
If you are a Terraform user, you can use our
Cyral IdP integration module for Okta
to setup both the Okta environment and Cyral control plane and get
the integration up and running in a few minutes using a single
terraform apply command.
If you don't use Terraform, you can follow the steps in this section.
In Cyral management console, create a SAML integration
Create a new SAML integration: Log in to your Cyral control plane UI, navigate to the Integrations section, find the SAML integration tile, and click Configure.
Create a new SAML connection:
Specify a Display Name. This display name is used to identify the IdP to the user when they log in.
In Attribute Names in SAML Assertion section, accept the default name for each required SAML attribute (first and last name, email, SSO groups).
Enable IdP-initiated login checkbox: When you add any IdP integration in Cyral, your users can log in using the Cyral Access Portal. If selected, this checkbox gives your users a second way to log in: from your IdP portal.
Set IdP-initiated login to
ONto give users the added option of logging in from your IdP-based portal (for example, an Okta portal).tip
Enabling IdP-initiated login requires a second ACS URL in your SAML app. For details, see SP-initiated and IdP-initiated login.
Set IdP-initiated login to
OFFto disable IdP-initiated login. Do this if login is not supported by your IdP, or if you don't want to let users log in from your IdP portal.
Click Continue
On the next screen, download the SP metadata file. You'll need this in the next step to set up your IdP. You are free to close the page. Your SAML Integration will save as a draft, and you will be able to return to it at a later time to finish entering the required configuration values.
In Okta, create an app to represent Cyral
Go to https://login.okta.com/ and log in to your account as an Administrator.
Click on the Admin button on the top right side of the screen.
Click on Applications: Applications and click Create App Integration.

Choose SAML 2.0 as the sign on method, and click Next.
Give the app an App name (for example, "Cyral"), add the Cyral logo as the App logo, and click Next.
On the Configure SAML section, you will need to configure the SAML URLs for the Okta App. Copy the following URLs to Okta from the SP Metadata obtained in the previous section:
- Single sign on URL: Copy the the AssertionConsumerService URL set as default from the SP metadata and paste it
into the Okta App field Single sign on URL. The URL has the following format:
https://$CYRAL_CONTROL_PLANE_DOMAIN/auth/realms/default/broker/$IDP_INTEGRATION_ID/endpoint/clients/$IDP_INTEGRATION_ID-clientinfo
The definition of the placeholders used in the URL formats above are:
$CYRAL_CONTROL_PLANE_DOMAINis the domain for your Cyral control plane.$IDP_INTEGRATION_IDis a unique alias that identifies the SAML integration, configured in the Cyral management console.
- Audience URI (SP Entity ID): Copy the Entity ID from the SP metatdata
and paste it into the Okta App field Audience URI (SP Entity ID). The URL has the following format:
https://$CYRAL_CONTROL_PLANE_DOMAIN/auth/realms/default - Other Requestable SSO URLs: Under the advanced settings tab, add Other Requestable SSO URLs. Copy the
AssertionConsumerService URLs and their indexes into Okta. The two
AssertionConsumerService URLs should have the respective formats:
https://$CYRAL_CONTROL_PLANE_DOMAIN/auth/realms/default/broker/$IDP_INTEGRATION_ID/endpoint/clients/$IDP_INTEGRATION_ID-clienthttps://$CYRAL_CONTROL_PLANE_DOMAIN/auth/realms/default/broker/$IDP_INTEGRATION_ID/endpoint
- Single sign on URL: Copy the the AssertionConsumerService URL set as default from the SP metadata and paste it
into the Okta App field Single sign on URL. The URL has the following format:
Map the Attribute Statements in order to specify which user data attributes will be sent to Cyral. For each of the following attributes, set the Name format to
Unspecified.First Name: This is required. Enter
firstNameas the Name of the Attribute Statement, anduser.firstNameas the value.Last Name: This is required. Enter
lastNameas the Name of the Attribute Statement, anduser.lastNameas the value.Email: This is required. Enter
emailas the Name of the Attribute Statement, anduser.emailas the value.
Name Name Format Value email Unspecified user.email firstName Unspecified user.firstName lastName Unspecified user.lastName In the Group Attribute Statements section, specify the groups information that Okta will share with Cyral. Set the name of the groups attribute statement to
memberOf. In the filter, specify regex that matches the groups you'll use. For example, if you wish to send group information for the groups named "Mathematicians" and "Scientists," you'll set the groups to Match the regex(Scientists)|(Mathematicians). If you want to send all groups, you can use the regex.*. Click Next once you've specified the needed groups.Name Name Format Value memberOf Unspecified Matches regex: .* In the next page, we suggest selecting the options:
- I’m an Okta customer adding an internal app
- This is an internal app that we have created
Click Finish and you'll be redirected to the page of your newly created Okta App.
On the Sign On section of your Okta App, go to the SAML Signing Certificates and locate an Active certificate. Then, click on the Actions button and click on View IdP metadata, as shown in the screenshot below:

A new page will be opened with the SAML metadata. Copy the URL of this page and use it to finish the integration configuration in the Cyral management console.
Add users and groups to the Okta app
In Okta, you must assign groups, users, or both to the Okta app that represents Cyral. Single sign-on via the Cyral/Okta integration is only available to users who are registered in this way, either individually or as a member of a registered group.
Go to Applications → Applications and click on the Okta app that represents Cyral.
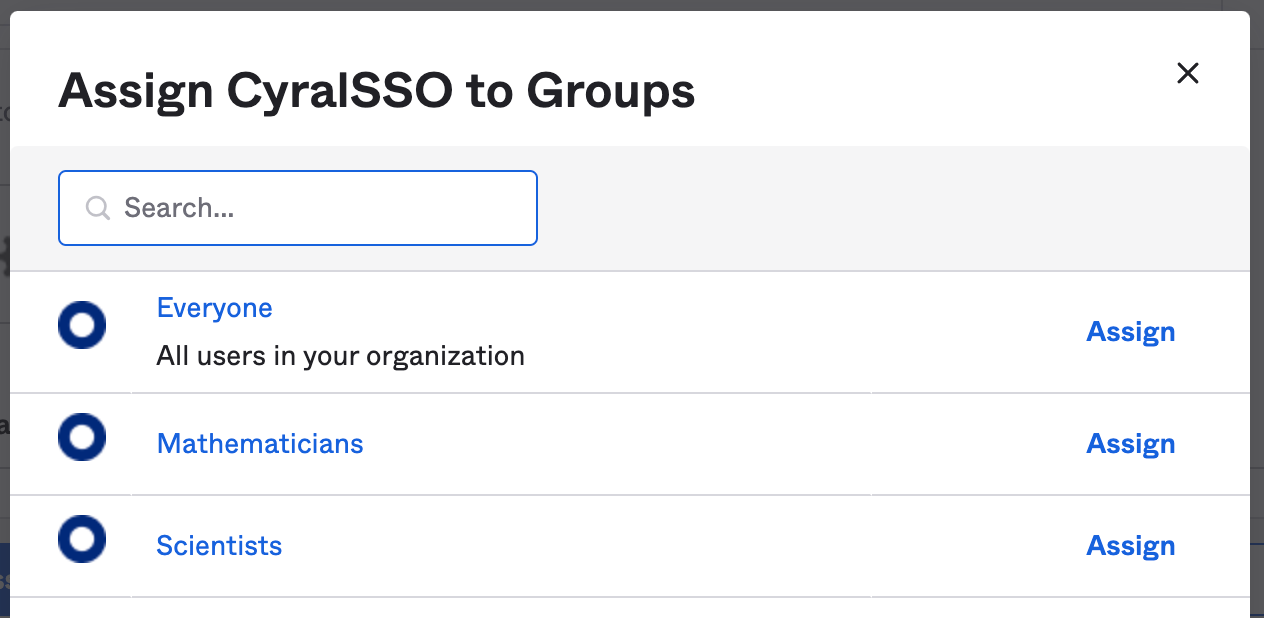
In the app page, go to the Assignments section, click the Assign button and do one or both of the following:
- Click on Assign to People and select the users who can sign on via Cyral
- Click on Assign to Groups and select the groups whose members can sign on via Cyral.
Save the assignments by clicking in Done. This completes your SSO setup in Okta.
In Cyral management console, complete the SAML integration
In this final step, you will supply the IdP Metadata from Okta to the Cyral management console.
Return to your SAML integration in the Cyral management console. Enter the IdP Metadata URL file you retrieved from Okta.
Click Save.
Your SAML Integration is complete.
Next step
See Set up SSO authentication for users for the steps to activate SSO authentication on each repository that will use it.
SCIM with Okta
Cyral supports the use of the SCIM protocol to retrieve group information from your Okta directory. While Cyral also supports other ways to retrieve group information from Okta, the SCIM approach is the only way to get group information for login workflows in which the user does not visit the Cyral Access Portal. For example, a Snowflake login with Cyral SSO relies on Cyral's SCIM integration to retrieve the user's group information.
Prerequisites
Before you set up the SCIM integration, make sure you have:
A working Okta SSO integration in Cyral.
tip
Cyral recommends that you create a new Okta SSO integration that is not being used in any other Cyral integration in your environment.
When creating the Okta SSO integration, Cyral recommends that you skip the final configuration step, Add users and groups to the Okta app, such that the Okta app has no users or groups assigned to it initially. Later, when you create the Okta SCIM integration with Cyral, you will assign users and groups.
Users who will log in with Cyral must have the following identity attributes stored in their Okta user record:
- first name
- last name
- username
Get configuration values from the Cyral UI
In the Cyral CP, navigate to Integrations ➡️ SAML ➡️ Configure ➡️ find your SAML SSO integration and click the pencil icon to edit.
Select Enable service account resolution. The Configure Your SCIM Integration panel appears.
Note the value shown in the field, SCIM connector base URL. In the next procedure, you or your SAML administrator will copy this value into SAML. Keep this tab open, or store this value securely until you need it. This value contains the OAuth bearer token, which must be kept secure.
note
The information shown here includes:
- SCIM connector base URL: The base URL for the SCIM integration endpoints.
- Supported provisioning actions: The provisioning actions your SAML app
will take for this integration. In our case, we want the SAML app to:
- Push New Users to Cyral
- Push Profile Updates to Cyral
- Push Groups to Cyral
- Authentication Mode: The method used by SAML to authenticate with Cyral. This will be an OAuth HTTP bearer token.
- Bearer Token: An OAuth access token needed for authentication and authorization with the Cyral SCIM endpoints associated with the given integration instance. :::
Click Save.
Configure SCIM in Okta
Perform the following steps in your Okta dashboard.
Set up and test SCIM
Add SCIM provisioning to your existing Okta app used for Cyral SSO (mentioned in the procedure above):
In a new browser tab, open the Okta documentation page, Add SCIM provisioning to app integrations.
note
In the guide linked above, you or someone on your team will have already completed Task 1 (Create an SSO integration that supports SCIM) when setting up the Okta SSO app for Cyral.
Use the values described in Step 3 of the Get configuration values from the Cyral UI to configure your SCIM integration. For the Unique identifier field for users field, you need to use the SCIM attribute defined by Okta to uniquely identity SCIM users. In this case, we will write userName.
Click Test Connector Configuration. The UI should look something like this:
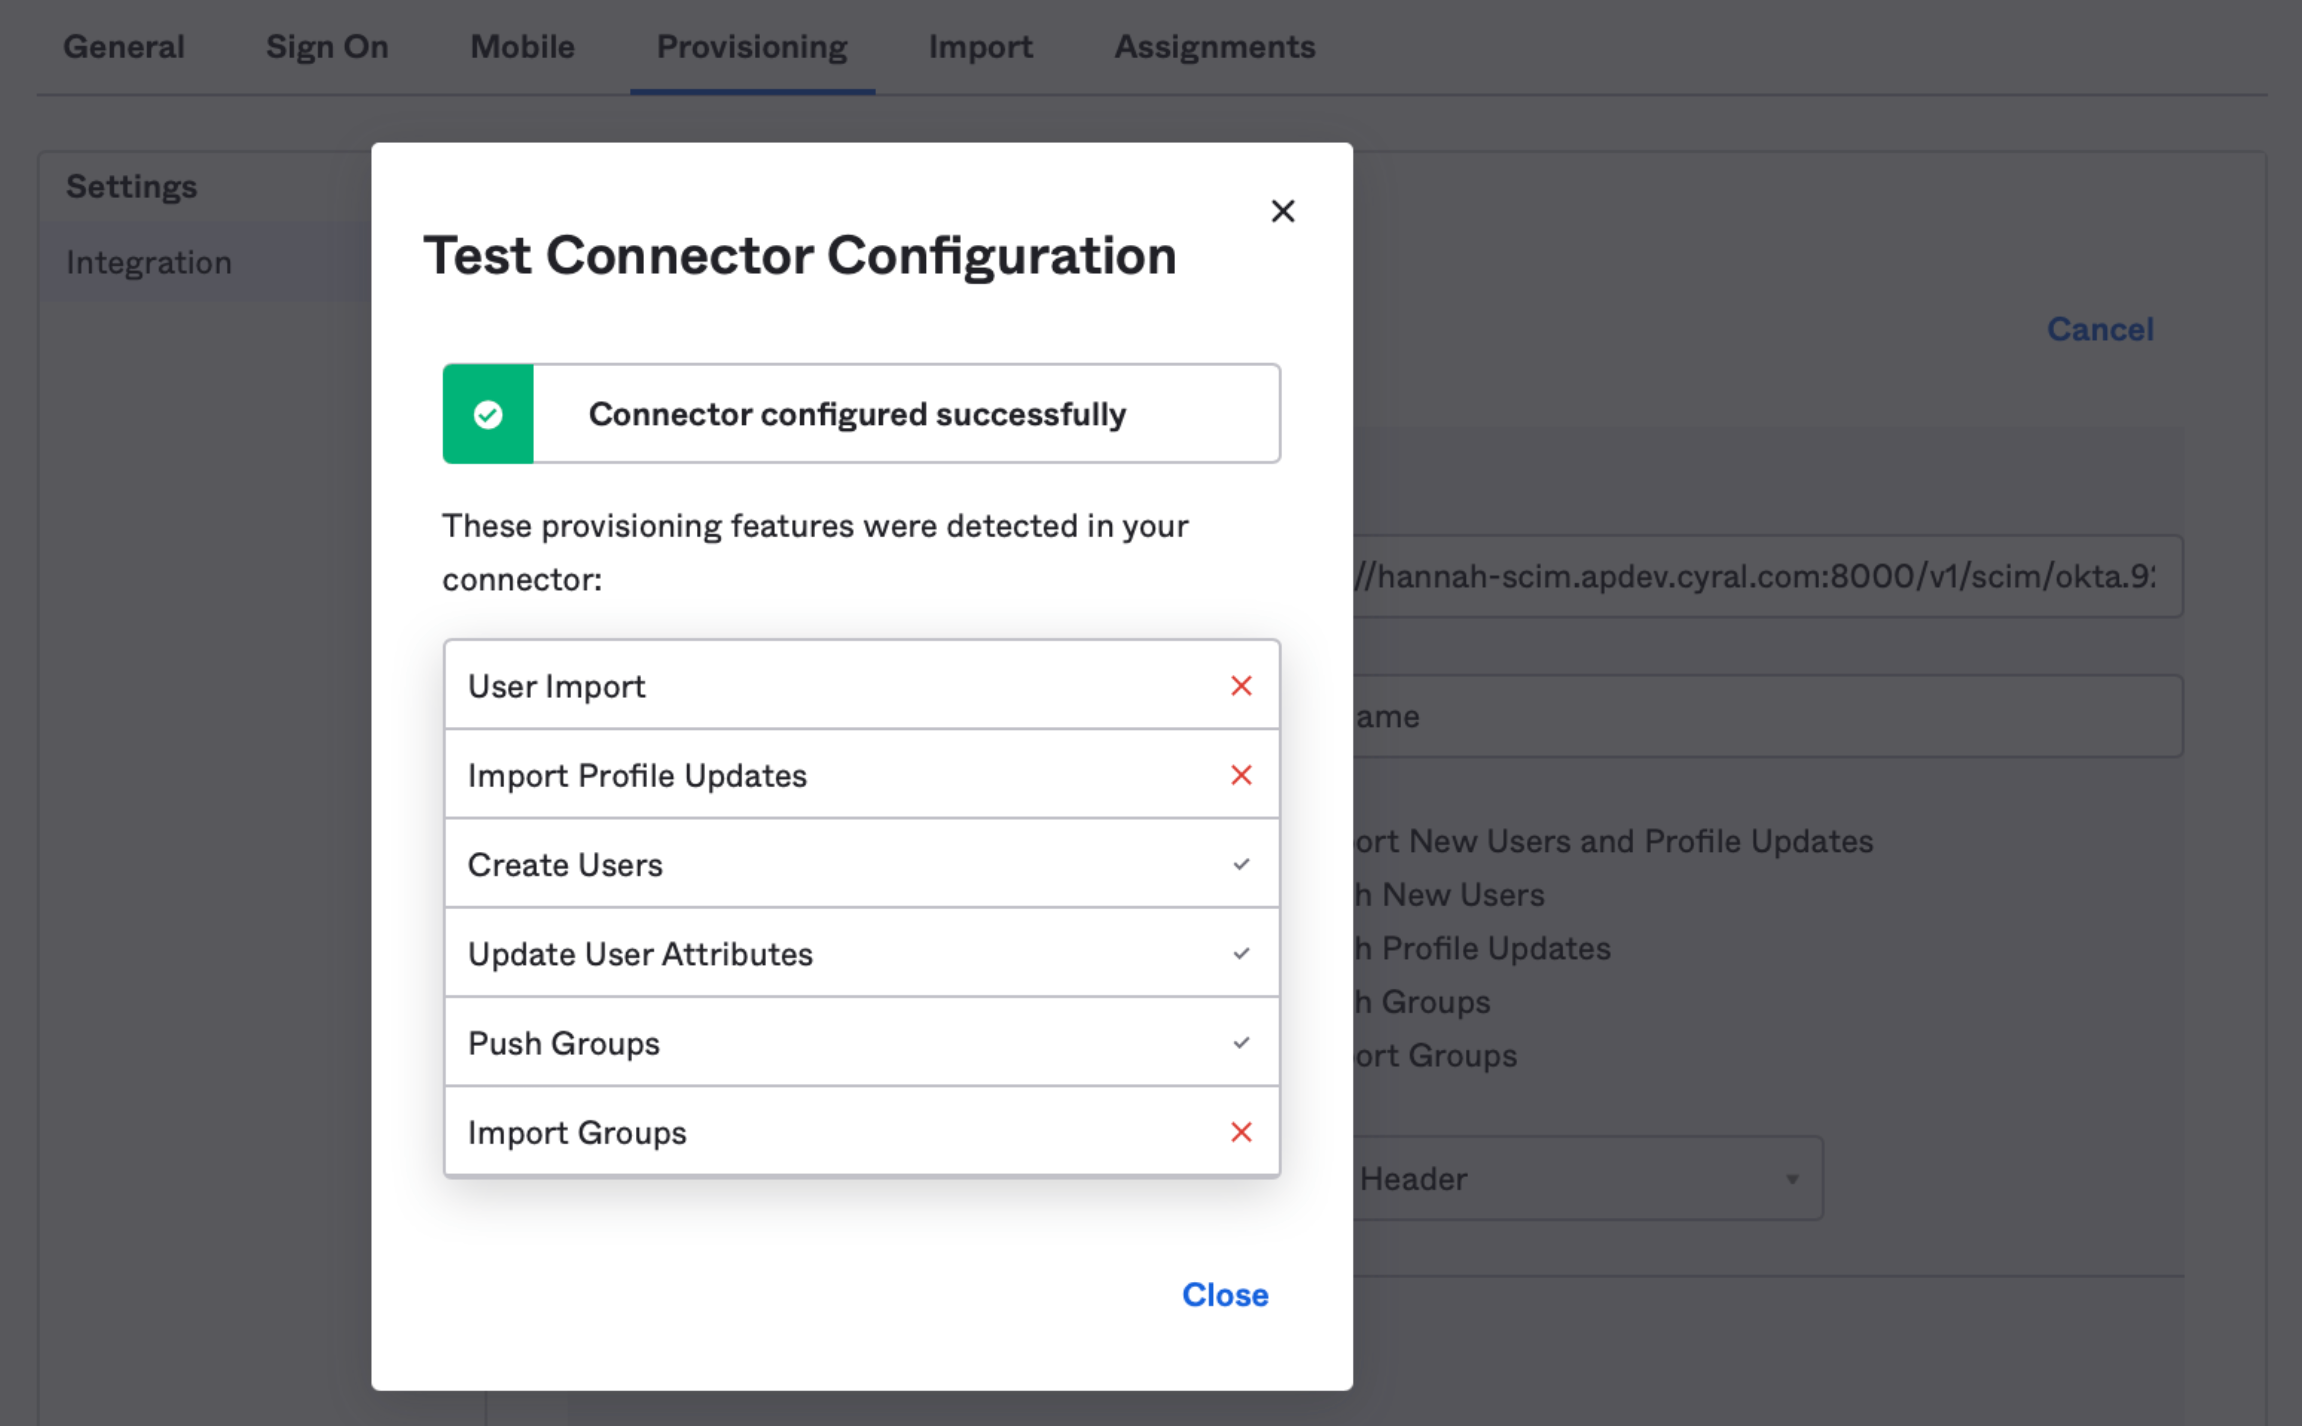
tip
Errors here may indicate a failure to authenticate with the Cyral API. In this case, double check your configuration information. If your connection information looks correct, regenerate the HTTP Bearer token by clicking Save again in the Cyral in the Configure Your SCIM Integration panel. Add the new HTTP bearer token to your configuration in Okta.
Click Close and Save.
Enable user provisioning
The following steps will start the provisioning process to copy Okta users and groups to Cyral.
tip
When setting up a new SCIM integration, Cyral recommends first testing the steps below with a limited set of users and groups, before you attempt to import all users.
In the Okta UI, in your SSO app's Provisioning tab, a new menu item, To App will appear in the navigation menu on the left. Click To App ➡️ Edit.
Enable the following:
- Create Users
- Update User Attributes
- Deactivate Users
Click Save
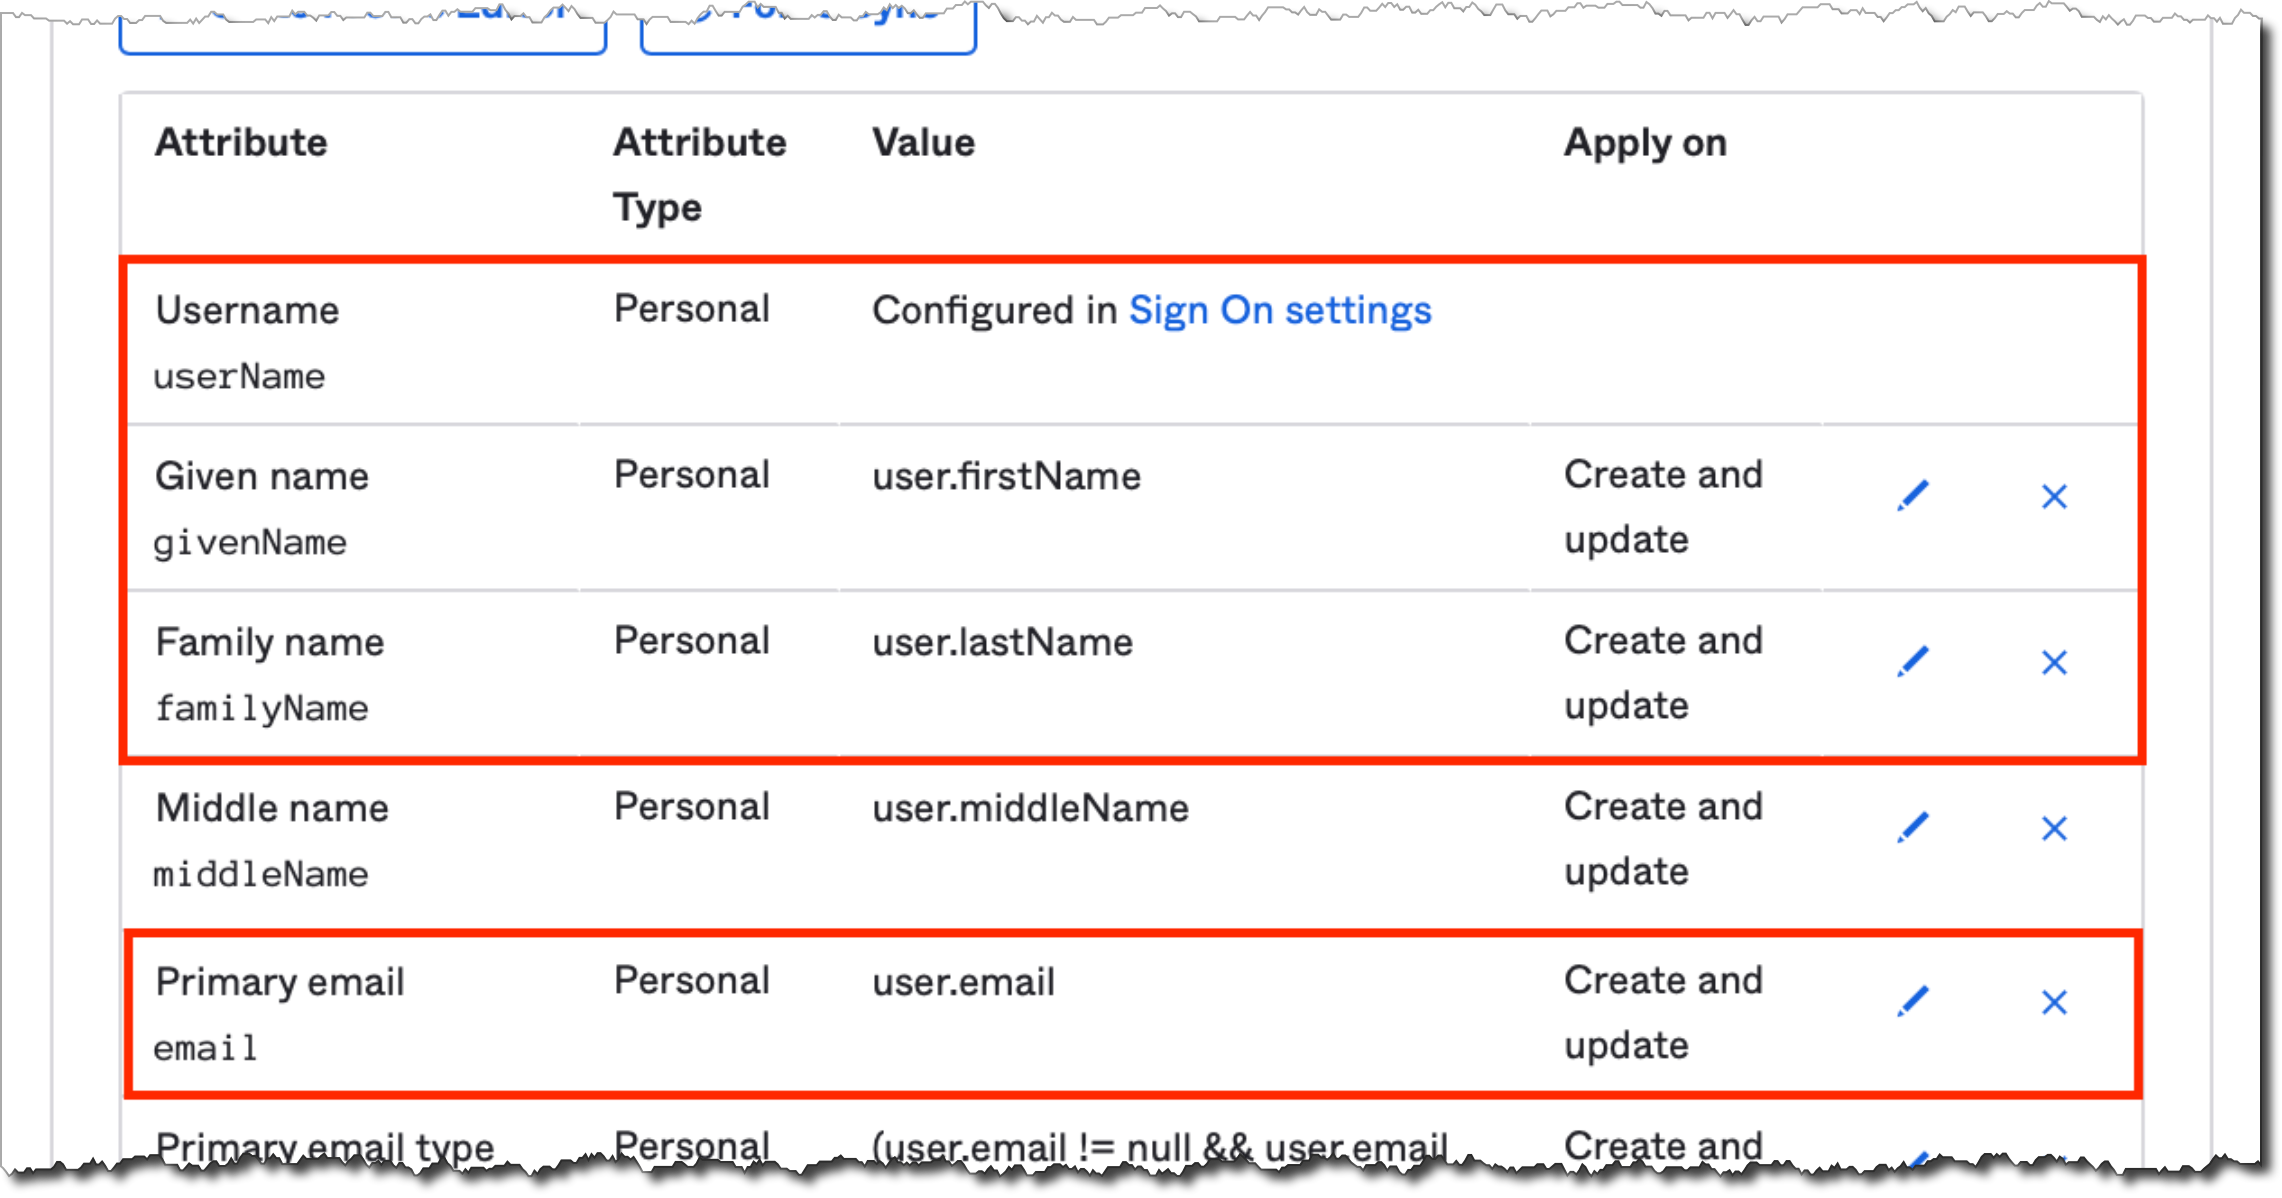
On the same page, scroll down to the Attribute Mappings section. Make sure first name, last name, username, and email are mapped. Remove any other attributes that you do not wish to share.
caution
The integration requires that you include Attribute Mappings for:
- first name
- last name
- username
- email :::
When finished with the desired attribute mappings, select Force Sync.
Navigate from the Provisioning tab to the Assignments tab.
Assign appropriate users and groups to the application
note
If this is an SSO integration that already has Users provisioned to it, you will see the error, "User was assigned this application before Provisioning was enabled..."
If this happens, click the Provision User button.
If all users were provisioned via groups (see the column Type), this will automatically provision all users.
Open View System Logs in new tab to verify that users were properly provisioned.
Push SSO groups to Cyral
In order to take full advantage of Cyral’s identity attribution capabilities, the groups for all SSO users must be pushed to Cyral.
Prerequisite
Before you can push a group from Okta to Cyral, all users in that group must have been provisioned in the Okta SSO app that you're using for SCIM. This is required by Okta. To do this:
Assign the group directly to your SSO app in Okta using the Assignments tab
Check that all users were provisioned correctly.
Procedure
In the Okta UI, in your SSO app, click on the Push Groups tab.
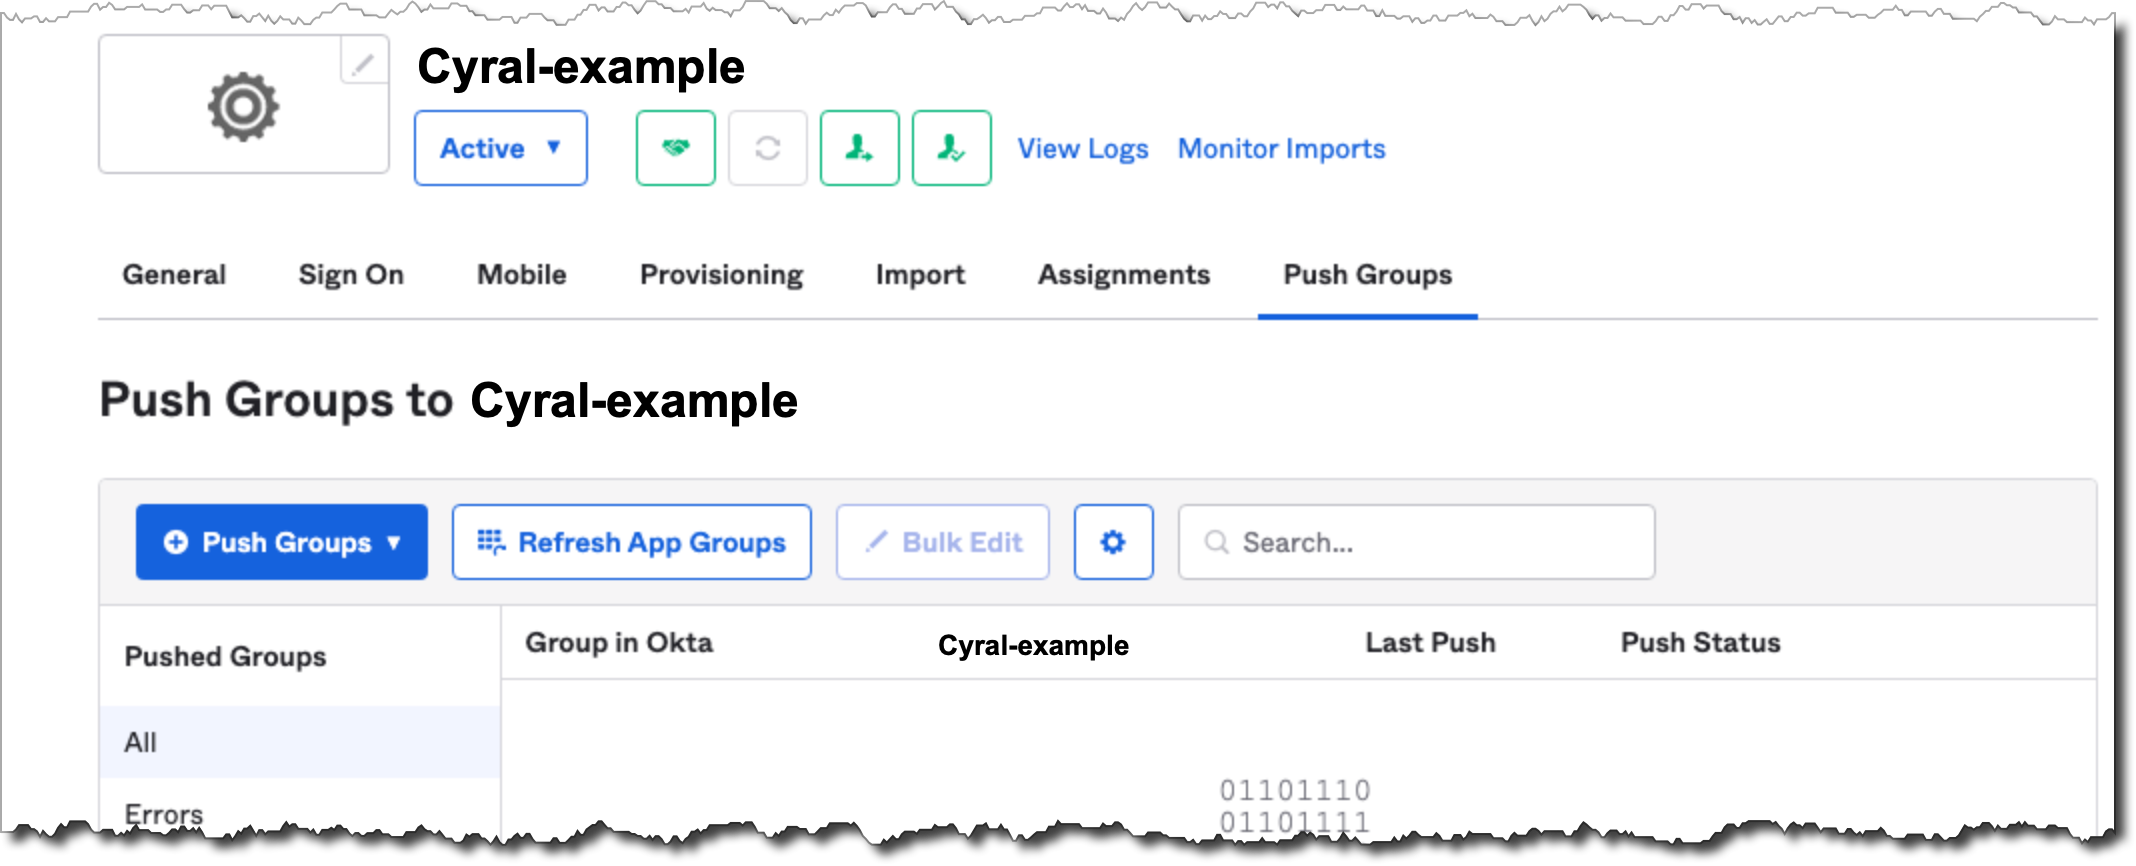
Select Push Groups ➡️ By name.
note
Pushing By rule is also supported, but Cyral recommends that you first push a small group By name as a test.
Type in the name of the group you wish to push and select it.
tip
If the only group assigned to the app under the Assignments tab is the default Okta group Everyone (containing all users in the Okta instance), no groups will should up. You must first assign to the application one group that is NOT the Everyone group.
The Okta UI will let you create a new group in the Cyral SCIM application, or link it to an existing group. Since there will be no existing groups in the Cyral SCIM application, choose Create Group.
The Push status will change from Pending to Active once the group has been provisioned successfully.
Once again, check the System Logs by clicking View Logs to verify that the configuration was successful.
Next step
With SCIM configured, your Cyral installation can provide service account resolution for Looker and Tableau, ensuring you know the SSO user identity of users who connect to a repository through a service account. See set-up instructions: