SSO with G Suite
With Cyral, you can authenticate database users against your G Suite instance. Below, we show how to set this up.
Prerequisites
- Make sure you have administrator-level access to your G Suite Admin Console.
In Cyral management console, create a SAML integration
Create a new SAML integration: Log in to your Cyral control plane UI, navigate to the Integrations section, find the SAML integration tile, and click Configure.
Create a new SAML connection:
Specify a Display Name. This display name is used to identify the IdP to the user when they log in.
In Attribute Names in SAML Assertion section, accept the default name for each required SAML attribute (first and last name, email, SSO groups).
Unselect the Enable IdP-initiated login checkbox. IdP-initiated login is not supported with G Suite.
Click Continue
On the next screen, download the SP metadata file. You'll need this in the next step to set up your IdP. You are free to close the page. Your SAML Integration will save as a draft, and you will be able to return to it at a later time to finish entering the required configuration values.
Create SAML IdP app in G Suite
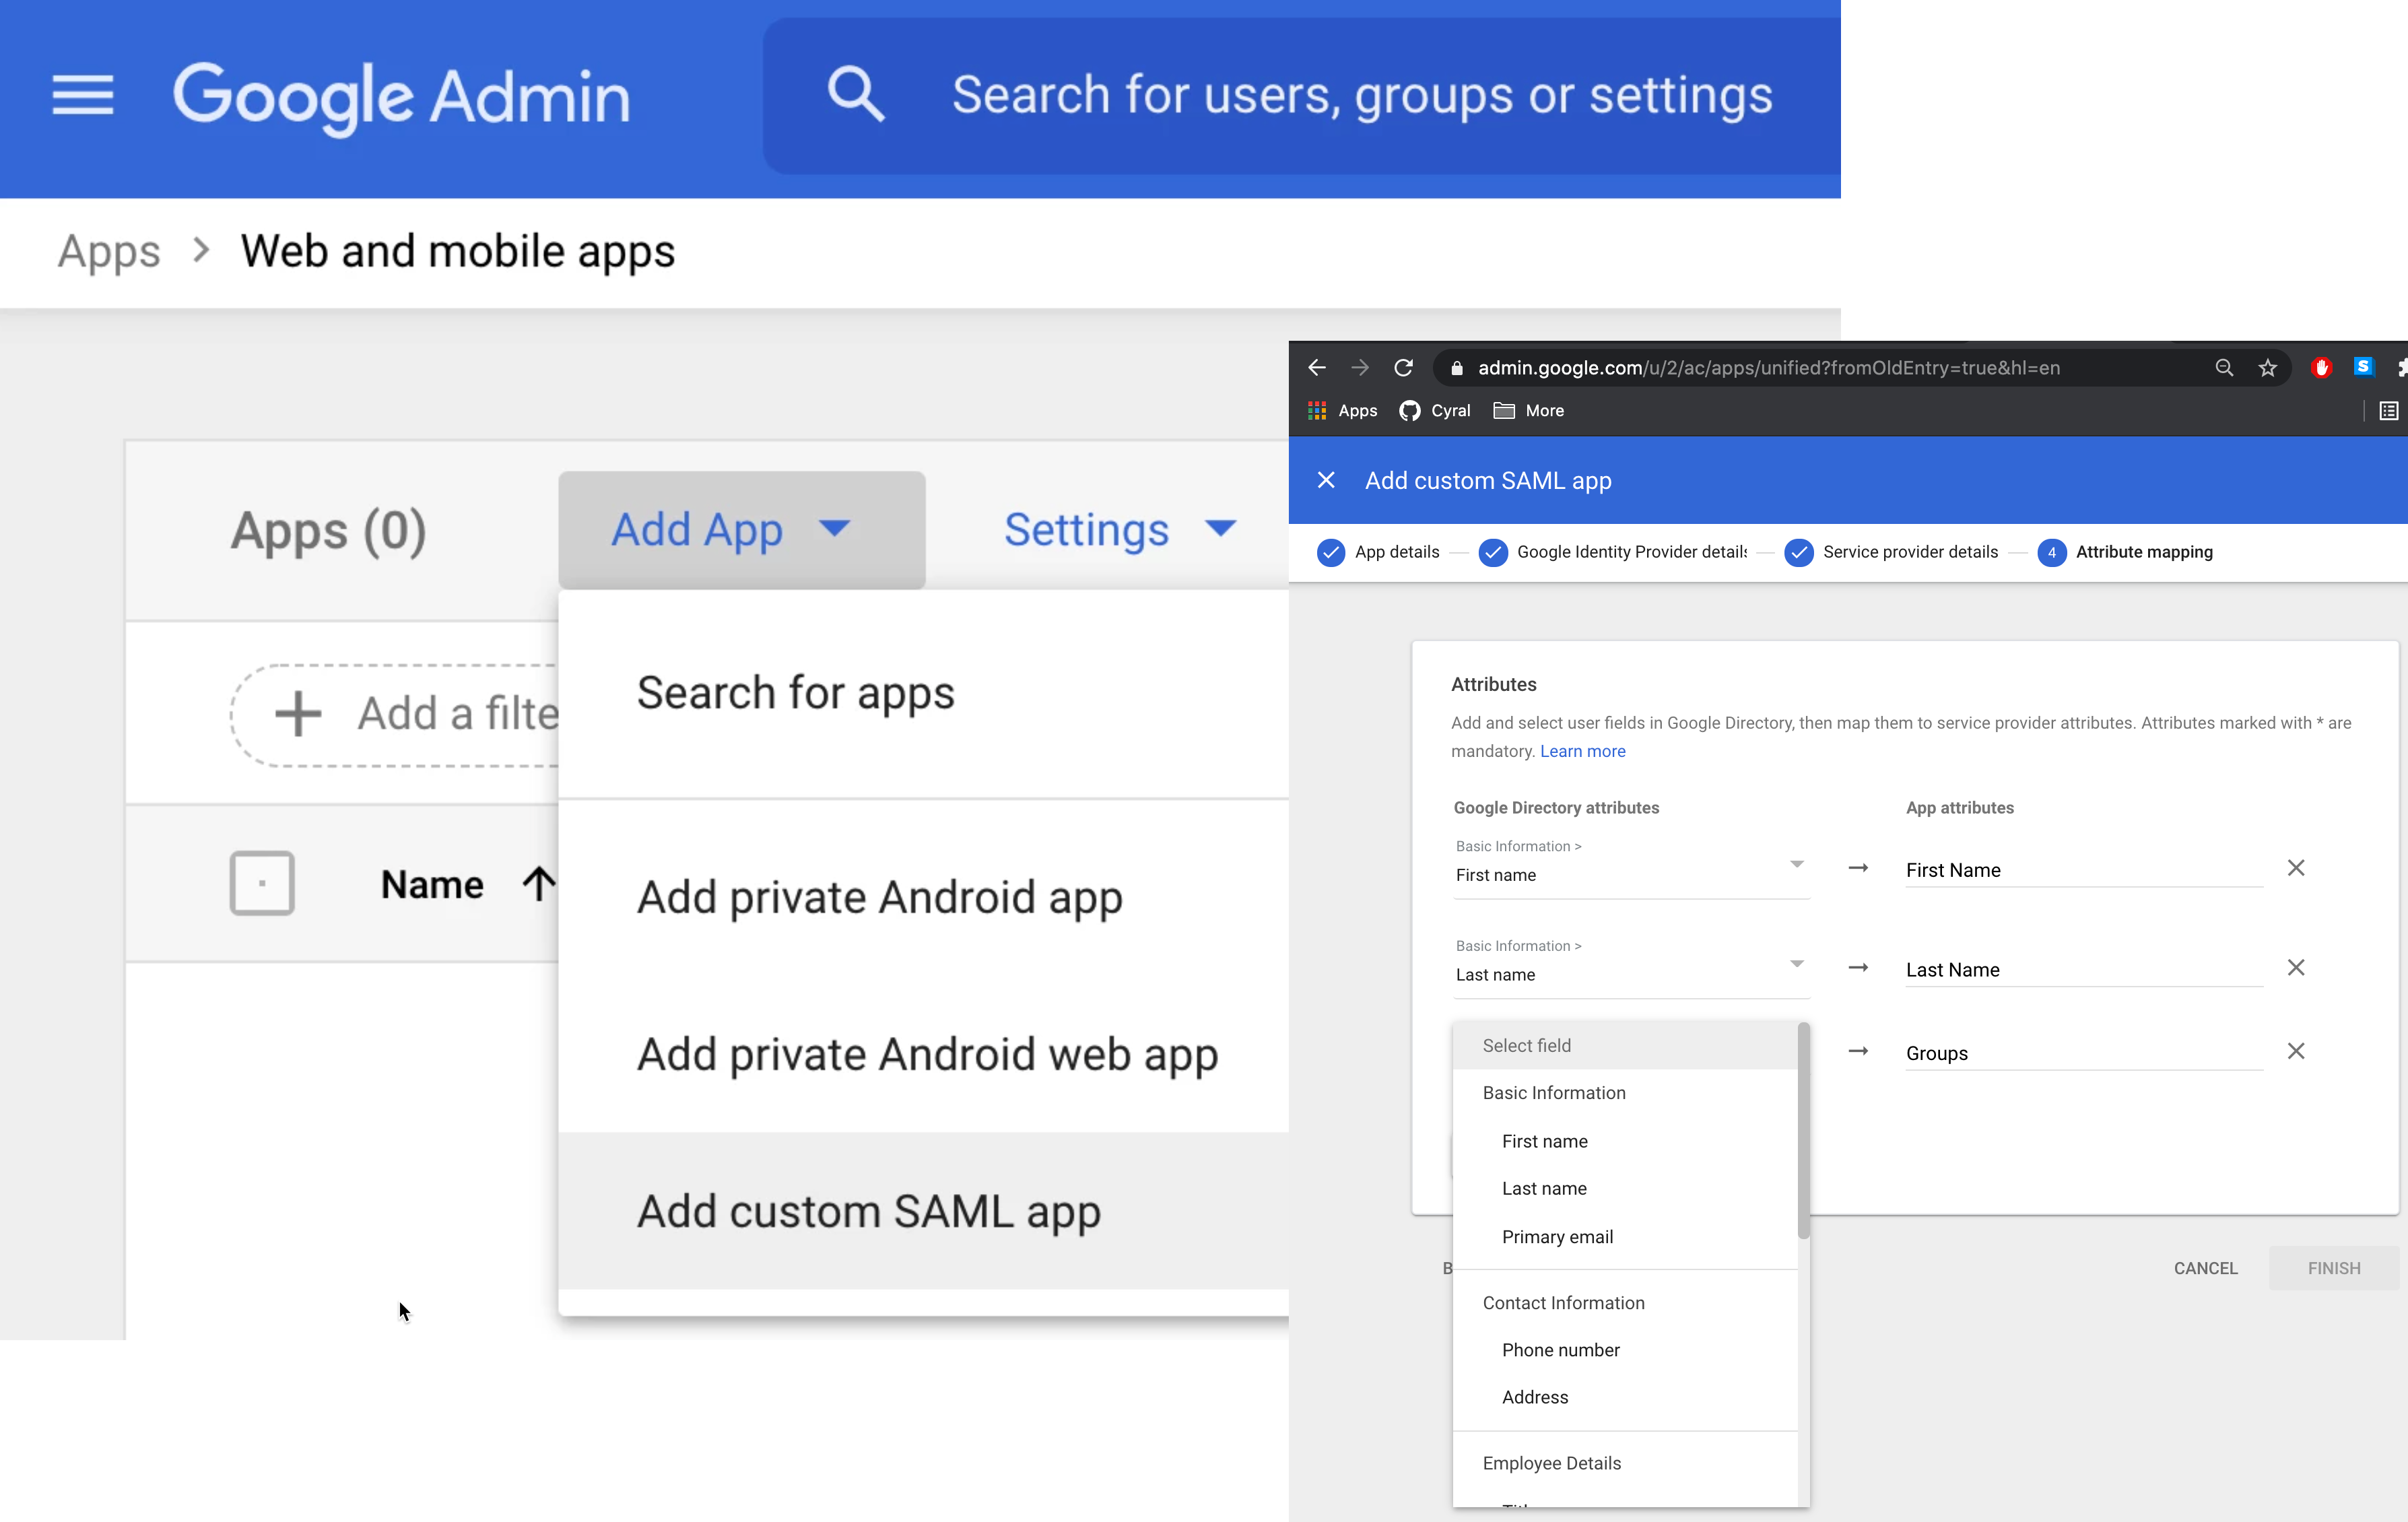
Navigate to the G Suite Admin Console and select Apps ➡️ SAML Apps ➡️ Add App ➡️ Add custom SAML app
Give your custom SAML app a Name that makes it clear this is the app for Cyral integration. For example, Cyral. Select Continue.
Click Download metadata and save the downloaded file. You'll upload it later in the Cyral control plane UI. Select Continue.
Open the SP Metadata document that was downloaded from the Cyral management console while creating a SAML integration. Copy the following URLs to GSuite from the SP Metadata obtained in the previous section:
- Set the ACS URL in GSuite using the AssertionConsumerService
element from the SP metadata. The URL has following format:https://$CYRAL_CONTROL_PLANE_DOMAIN/auth/realms/default/broker/$IDP_INTEGRATION_ID/endpoint - Set the Entity ID in GSuite to the Entity ID from the SP metatdata.
The URL should have the following format:Click continue.
https://$CYRAL_CONTROL_PLANE_DOMAIN/auth/realms/default
- Set the ACS URL in GSuite using the AssertionConsumerService
On the Attribute mapping page, specify which user data attributes will be sent to Cyral. Enter the following into the App attributes field:
First Name: This is required. Choose First name from the drop-down list and enter
firstNameas the App attribute.Last Name: This is required. Choose Last name from the drop-down list and enter
lastNameas the App attribute.Email: This is required. Choose Primary Email from the drop-down list and enter
emailas the App attribute.Groups: This is required. From the drop-down list, select all the groups that will be sent to Cyral and used to manage access. Once you have selected the appropriate groups, enter the
memberOfas the App attribute.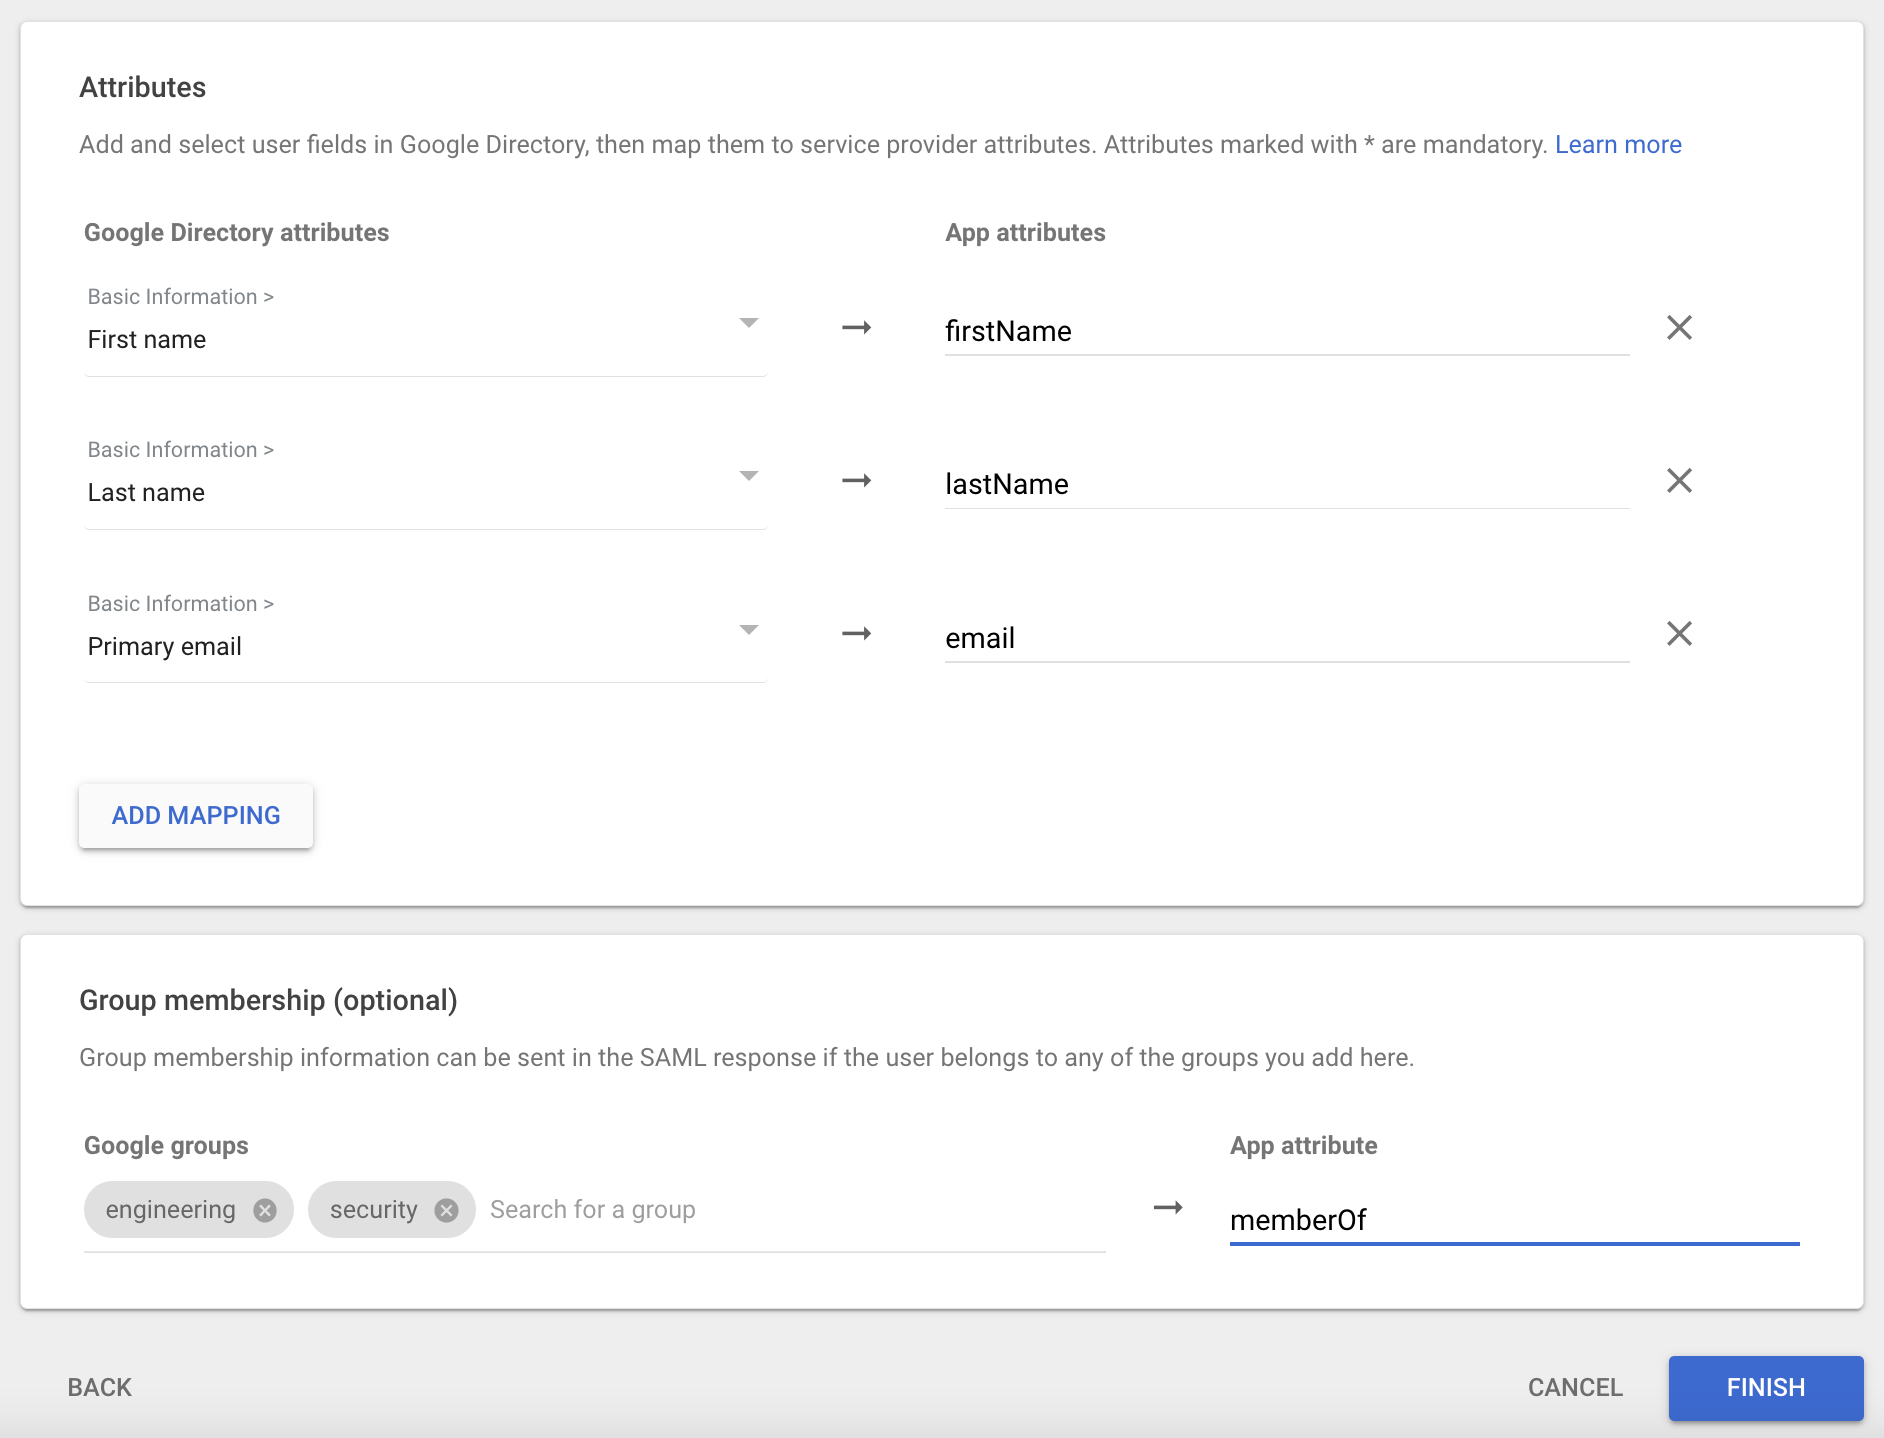
Click Finish.
In the Google Admin ➡️ Web and mobile apps page for your SAML app, go to User access ➡️ View details.
On the details page, use the left bar to turn the app ON for everyone or ON for the subset of users who will access databases through Cyral.
info
Choosing a subset of users does not cause information about the subset to be provided to Cyral.
warning
Creating or updating a SAML App in G Suite does not take effect immediately. Plan to wait 24-48 hours for your G Suite SAML App to become usable for Cyral SSO logins.
In Cyral management console, complete the SAML integration
In this final step, you will supply the IdP Metadata you downloaded from Gsuite to the Cyral management console.
Return to your SAML integration in the Cyral management console. Upload the IdP Metadata XML file you retrieved from GSuite.
Click Save.
Your SAML Integration is complete. You can verify it by logging into your CP using the new G Suite integration.
warning
Since IdP initiated login is not supported, the Test SAML Login button in the G Suite Admin Console will fail. Please test the integration by logging in through the Cyal management console.
Next step
See Set up SSO authentication for users for the steps to activate SSO authentication on each repository that will use it.